Homebrewing an Everyday IPA
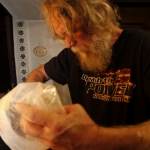
For some reason a lot of people think that because I enjoy craft beer so much I must also be a home brewer; well, that is not the case. Primarily because when I first got into craft beer it was due to being on the road more than I was home, so I never really considered it. As time progressed to 2013 I knew I would eventually take the step, but it was not a priority and I was doing other things. In July some friends gave me a Brooklyn Brewshop Beer Making Kit. It was decided that I would write an article about the experience as a first time home brewer. Since it was July and they did not build homes with air conditioning around here, I knew I did not want to boil anything in my kitchen for a couple more months. I looked at the box with its five easy steps and figured “How hard can it be?” I would read the instructions a few times, hit up YouTube and breeze right through this. Not exactly. So, this is written from the perspective of a first time home brewer to a first time home brewer. Or should I say, a first time all-grain home brewer.
I might as well address this first; I am not sure that it would change my experience because I had no say in the matter. I am talking about brewing from extract or all-grain. To tell you the truth, people would ask which way I was doing it and I would say it was a kit. I seem to recall they all presumed it was extract; I did not know what the difference was until after I did my first home brew. If you do not know, I will summarize it for you. If you brew from an extract they have essentially made the wort for you and you just add water and boil. Sounds really easy, I could get into that. The other method is all-grain; it is more work but if you know what you are doing you have a lot more control. If your kit came with a bag of fluid, you are brewing from extract; if it comes with a bag of grain you aren’t. So, brewing from extract is fun; brewing from all-grain is almost work, at least for a beginner. For the record, the Everyday IPA is an all-grain mix; it never mentions that fact on the box although it does show you making mash, so they presume you know the difference.
Actually, while my beer is fermenting I have talked to friends that have suggested that Brooklyn Brewshop is presuming a lot of things, which I discovered a little too late in the process, so learn by my mistakes. On the box they do tell you that you are going to need a six quart pot (a second pot is handy), a fine mesh strainer and a funnel. Since all the instructions I have seen hinted that this was “as easy as making oatmeal” and since Tanya, my girlfriend, is pretty handy around the kitchen I was confident that whatever cooking supplies we did not own would not be a problem in obtaining.
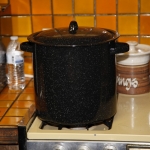
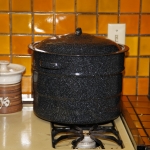
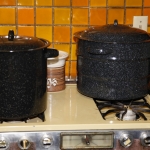
Since Tanya wanted to do some canning anyway and we did not own any pots that size she purchased a 20 and 15 quart pot. Error number one by Brooklyn Brewshop is that if you follow their instructions, you really need three pots. Our funnel was pretty small so she went to Target for a larger one; she ended up in the automotive department for the largest in the store, which was not very big and would make a difference later. Tanya makes my cereal from sprouted grains, so we figured the strainers we owned would be sufficient. This is one of those presumptions Brooklyn Brewshop made. Take my word for it, unless you make a lot of pasta you probably do not have a strainer big enough in your kitchen. Go to your local brewing supply shop and buy one from them. Otherwise, go to a cooking store and make sure the diameter of it is at least 10 inches. Of course, if at a home brewing supply shop, see if they have a grain bag; it sounds easier. We picked up extra StarSan sanitizer and some swingtop bottles; I think we are ready.
To prepare they tell you to use their sanitizer and rinse everything you are going to use. I am probably a little anal about stuff like that so was happy that the kit came with StarSan sanitizer as it does not have to be rinsed off or dried after sanitizing. I sanitized the pots that the boiling water was going to be in, the thermometer, strainer, funnel, fermentation jug and pretty much everything except the bottles since they will not be used for two more weeks. Our water tastes terrible and we use a Zero Water filtration unit for our drinking water. I wanted to clean all of the water first, but brewers convinced me that boiling would suffice. Be that as it may, I knew that additional cold water would be added later, so I chilled a couple quarts of filtered water ahead of time.
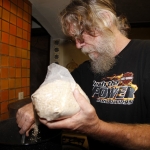
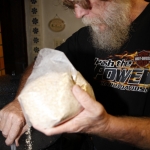
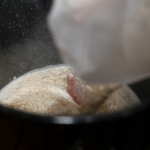
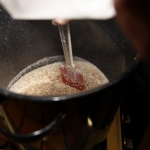
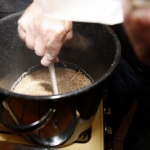
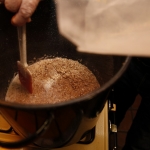
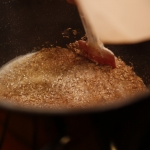
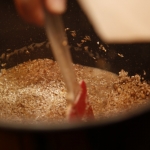
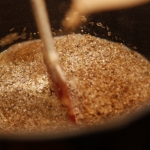
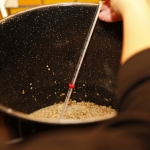
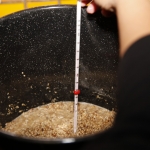
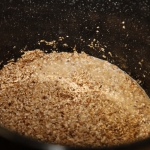
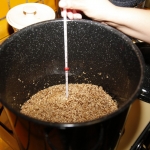
The next two steps were creating the mash and the splarge. The mash consisted of heating two quarts of water and adding the grain, then cooking it. The splarge was going to require four more quarts of hot water, so it was pretty apparent two pots were needed and both need to be heated at about the same time since it is pretty difficult to just come up with four quarts of 170 degree water on demand. Since these four quarts are going to be used later, start is a little later and add some additional water as you are going to have a lot of evaporation. Which brings up another issue, at no point do these instructions tell you if you should cook covered or uncovered. They tell you to check every 10 minutes and add heat as required, so we did it primarily covered.
The splarge is where things started to get weird. The Brooklyn Brewshop instructions state:
• Heat additional 4 quarts (3.8 liters) of water to 170°F (77°C).
• Set up your “lauter tun” (a strainer over a pot).
Carefully add the hot grain mash to the strainer, collecting the liquid that passes through.
• This liquid is called “wort” (pronounced “wert”). It will be your beer.
• Slowly and evenly pour 170°F (77°C) water over the mash to extract the grain’s sugars.
• You want to collect 5 quarts (4.75 liters) of wort. You will lose about 20% to evaporation later on, so you want to start with a bit more than you’ll end with.
• Re-circulate wort through grain once
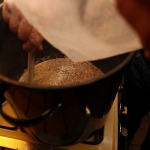
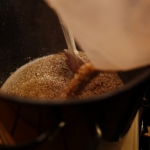
So, you have your mash in one pot, you need the additional 4 quarts of hot water in another and you need to put a strainer over a third pot so you can separate the grain (mash) from pot one from the wort; and you have to re-circulate the wort through the grain. It became very obvious that we needed a third pot; so we sanitized the largest one we had left and proceeded to separate the wort from the grain. It was at this point that we realized there was no way that all this wet grain was going to fit in the strainer much less be able to run it through twice. It was at this point that Tanya made the executive chef’s decision to just put the grain back in the wort for a few more minutes rather than try to make multiple runs on half the grain at a time.
At this point we began the boil and the addition of the hops. Pay attention as it can be a little confusing as you use 1/5 of the hops every 15 minutes until the end when you add 1/5 at the 55 minute mark and 1/5 at the 60 minute mark. I am not convinced it is that important. The next step is the cooling of the wort and pitching of the yeast so you can begin fermentation. Before you add the yeast you have to cool the wort down to 70 degrees; to do this they tell you to put your brew pot in an ice bath. You are going to want a lot of ice as it does not take long for a pot holding boiling liquid to melt a bunch of standard ice cubes. In retrospect I think I should have started gathering ice the day before. If you were going to have a cooler full of ice water to keep beer and soda cold at a picnic, you would have the right idea.
After the wort is cooled you will want to fill your fermentation jug; this is where the funnel comes into play. The instructions state; “Once cooled, place strainer over funnel and pour your beer into the glass fermenter. Yeast needs oxygen. The strainer helps aerate your wort and clarify your beer (as well as catch any sediment from going into the fermenter). Add tap water to bring wort up to 1 Gallon mark if level is low.”
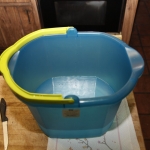
Here was the beginning of another problem. Since the mouth of the funnel was only about four inches in diameter that meant that we would need to use a strainer that would fit inside of it. We had one that fit perfectly so we began pouring the cooled wort from the brew pot through the strainer and funnel into the fermentation jug and experienced a new problem. What they fail to mention is that this entire process is going to generate some sludge; actually it is going to generate a lot of sludge. This sludge will plug up your strainer, guaranteed. For this reason you want to make sure you get a funnel with the widest mouth possible. We probably should have shopped for a funnel at Discount Auto Parts instead of Target in order to get a funnel with a big enough mouth. After about an hour of pour two ounces, clean the strainer, pour two more ounces, clean strainer, we eventually got all the wort in the fermentation jug. We were definitely short of the one gallon mark so I added the pre-chilled and purified tap water to the jug and brought the level up to about a gallon.
At this point you “pitch the yeast” which means add the envelope of yeast to your wort. You will want to use sanitizer to wash your hands because you need to put one hand over the opening of the fermentation jug and start shaking it vigorously. I don’t really know how long or hard constitutes vigorous, so do it as long as you can as hard as you can. At this point you put your rubber stopper on the jug, stick the sanitized rubber tube about an inch inside the jug and put the other end of the tube in a cup of sanitizer. This is a blow off tube that allows the CO2 to escape. By the time I finished the process it was time for bed, when I woke up the next morning it was bubbling pretty furiously; by Sunday morning it had subsided. This is when you assemble your sanitized airlock, add some sanitizer inside it and put it in the rubber stopper. At this point my beer is fermenting in my closet for two weeks at which point I can begin bottling.
This entire process took about five hours, maybe a little longer. The most difficult part of the process was probably getting the wort into the jug. By the time I got to this part I was pretty discouraged. I had run into issues and improvised; only time will tell if it worked or not. Luckily, I have lots of brewers around here that are anxious to try my first home brew and I am sure I will get lots of valuable input. To be honest, I am not that eager to taste the Everyday IPA because I have little confidence in the process. The good thing is that I know there was fermentation going on; whether or not it translates to being a drinkable beer is another story.
Since I did the brewing I have spoken with a few people with a lot more experience at home brewing than I. The consensus is the Brooklyn Brewshop presumes that if you are doing an all-grain brew that you must have some experience and know that you really need three pots and large-mouthed funnels and strainers. I have that experience now and for sure, before I brew again I will be stopping by South Bay Brewing Supply to get a bigger strainer and funnel. I am sure that will make a huge difference in my experience. Cheers!
Leave a Reply
You must be logged in to post a comment.

One Response to Homebrewing an Everyday IPA